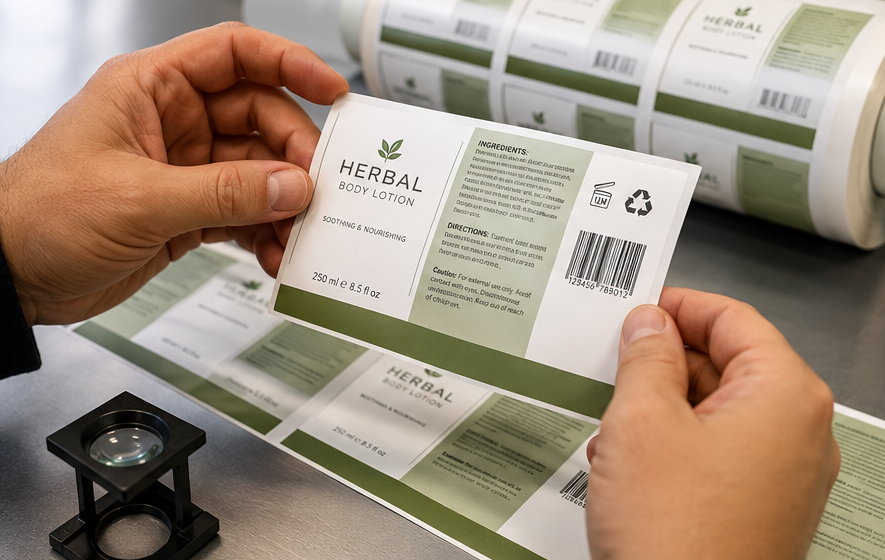
Label Unwind Direction: Roll Label Guide for Startup Brands
Updated: Jul 26
Your label design may be approved, your product may be ready, and your launch date may be set — but if the roll is wound the wrong way, the labels may not feed properly when it is time to apply them.
That is where the label unwind direction matters.
For startup brands designing product labels for the first time, unwind direction is one of those small production details that can easily get missed. The artwork may look perfect in a PDF, but roll labels are about more than design. They also have to peel, feed, apply, wrap, and line up correctly on the actual product.
If you are applying labels by hand, the unwind direction may be mostly a matter of comfort and speed. If a machine, applicator, or co-packer is applying your labels, the correct unwind direction can be essential.
What Is Label Unwind Direction?

Label unwind direction means which edge of the label comes off the roll first.
At CETTEC, we prefer using plain-language direction names because they are easier for first-time
label buyers to understand:
Right Edge First
Left Edge First
Top Edge First
Bottom Edge First
Instead of thinking only about how the label looks on screen, consider how it leaves the roll and meets the product.
A simple question helps:
When this label peels off the roll, which edge needs to touch the product first?
Why Startup Brands Should Care About Unwind Direction
If you are printing your first labels, the unwind direction may feel like a technical detail you can figure out later. The problem is that “later” may mean your product is already at the co-packer, your launch date is approaching, or your team is trying to apply hundreds of labels by hand.
The wrong unwind direction can cause:
Labels feeding the wrong way through an applicator
Labels are applied upside down or sideways
Slower hand application
Poor alignment on bottles, jars, pouches, or boxes
Extra labour during packaging
Delays if labels need to be reprinted
The most important rule is simple:
If someone else is applying your labels, ask them for the unwind direction before you print.
That includes co-packers, bottling lines, fulfilment partners, production kitchens, and anyone using a label applicator.
Before ordering, confirm the required unwind direction, core size and roll specifications with whoever will apply the labels. These details can then be included when requesting custom roll label printing in Vancouver.
Label Unwind Direction and Application Method
Different application methods create different risks.
Application method | How much does the unwind direction matter | What to confirm |
Hand-applied labels | Medium | Which roll direction is fastest and easiest for your team |
Tabletop label applicator | High | Feed direction, roll position, core size, and label orientation |
Automatic applicator | Very high | Exact unwind direction, face-in/face-out, core size, and maximum roll diameter |
Co-packer applied labels | Very high | Their required roll specification before printing |
Wrap labels for bottles or jars | Very high | Which edge starts the wrap, and how does the container rotate |
If your labels are being applied by hand, there is usually more flexibility. If your labels are being machine-applied, the roll needs to match the equipment.
The Four Label Unwind Directions

Right Edge First
Right Edge First means the right side of the label comes off the roll first.
This is often used when the label feeds into an applicator from one side and starts wrapping around the product from the right edge.
Best for:
Bottles
Jars
Tubes
Containers
Side-feed application setups
Labels where the right edge must lead into the applicator
Before choosing Right Edge First, confirm the product's travel direction, how it rotates, and which side of the label should contact the container first.
Left Edge First
Left Edge First means the left side of the label comes off the roll first.
This may be required when the applicator feeds from the opposite side or when the product rotates in the opposite direction.
Best for:
Opposite side-feed applicator setups
Bottle and jar labels
Co-packer requirements
Roll-fed labels where the left edge must lead
Left Edge First and Right Edge First are easy to confuse if you only look at the artwork on screen.
Always confirm based on the applicator setup, not just the design file.
Top Edge First
Top Edge First means the top of the label comes off the roll first.
This can work well for labels applied to flat surfaces, vertical panels, boxes, pouches, or products where the top of the design needs to feed first.
Best for:
Pouches
Boxes
Flat packages
Vertical labels
Top-applied labels
Labels placed on front or back panels
Top Edge First can be useful when the label is tall and narrow, but the final choice should still be based on how the label will be applied.
Bottom Edge First
Bottom Edge First means the bottom of the label comes off the roll first.
This may be required for certain applicators, flat-pack labels, or vertical application setups.
Best for:
Vertical application
Flat-pack labels
Certain pouch or box labels
Applicators that require bottom-first feeding
This direction is one of the easiest to overlook because the label may look normal in the artwork file, even though it needs to feed bottom-first during application.
Quick Comparison: Which Unwind Direction Fits Your Label?
Unwind direction | What it means | Common use | Confirm before ordering |
Right Edge First | The right side comes off first | Bottles, jars, containers, side-feed setups | Product rotation and applicator feed direction |
Left Edge First | The left side comes off first | Opposite side-feed setups, co-packer requirements | Machine direction and roll loading |
Top Edge First | The top comes off first | Pouches, boxes, flat surfaces, vertical labels | Whether the top edge should lead into the applicator |
Bottom Edge First | Bottom comes off first | Flat-pack labels, vertical labels, specific applicator setups | Whether the artwork must feed bottom-first |
Face-Out vs Face-In: Another Roll Detail to Confirm
Unwind direction is not the only roll setup detail. You may also need to confirm whether labels should be wound face-out or face-in.
Face-out means the printed side of the label faces outward on the roll.
Face-in means the printed side faces inward toward the core.
For many hand-applied labels, face-out is common and convenient. For machine-applied labels, the equipment may require a specific direction. If you are using a co-packer, ask for their full roll label specification before ordering.
Other Roll Label Details First-Time Buyers Should Confirm
A good roll label order is not only about size and quantity. It should include enough production detail for the label to work in real life.
Before printing, confirm:
Label size: width x height at final trim size
Bleed: usually 1/8 inch if colour or images run to the edge
Safe margin: keep text, logos, and barcodes away from the trim edge
Resolution: use high-resolution images, ideally 300 dpi at final size
Colour mode: CMYK is preferred for print production
Barcode quiet zone: leave enough blank space around the barcode
Material: paper, synthetic, clear, white, textured, or specialty stock
Adhesive: permanent, removable, freezer-safe, or specialty adhesive
Finish: matte, gloss, laminate, or uncoated
Core size: the inside diameter of the roll core
Maximum roll diameter: important for applicators and dispensers
Application surface: glass, plastic, paperboard, pouch film, metal, or another material
These details help prevent surprises during production, packing, and application.
Material and Finish Matter Too
Unwind direction helps the label feed correctly. Material and finish help the label survive its actual use.
A few examples:
A dry product box may work well with a paper label.
A refrigerated jar may need a moisture-resistant material or laminate.
A handled retail product may benefit from a gloss or matte laminate.
A natural product brand may prefer an uncoated or textured paper look.
A squeeze bottle or curved container may need a flexible material and suitable adhesive.
For Vancouver startup brands selling at markets, cafés, retailers, or online, the label needs to look good beyond the first application. Think about transport, shelf handling, condensation, rubbing, and storage conditions.
Common First Label Mistakes to Avoid
Designing Before Measuring the Product
Do not design the label only from a template or a guess. Measure the actual container.
Check:
Width and height of the available label area
Curved or flat surface
Tapered sides
Seams, ridges, caps, and shoulders
How much of the label wraps around the product
A label that looks balanced on screen may feel too large, too small, or awkward once applied.
Placing Text Too Close to the Edge
Small trimming movement is normal in print production. Keep important content inside the safe area.
Avoid placing these too close to the trim edge:
Ingredients
Net weight or volume
Company name
Contact information
QR codes
Barcodes
Small icons or certification marks
Choosing the Label Stock Based Only on Appearance
Appearance matters, but the label also needs to suit the product environment.
Ask whether the label will face:
Moisture
Refrigeration
Freezing
Oil
Handling
Shipping friction
Outdoor exposure
Curved or squeezable surfaces
The right material can prevent peeling, scuffing, curling, cracking, or early wear.
Forgetting to Test the Barcode
Barcodes need enough size, contrast, and quiet zone to scan properly.
Before full production, test the barcode at the final printed size whenever possible. This is especially important for retail products, food labels, cosmetics, supplements, and packaged goods going into stores.
Guessing the Unwind Direction
This is the mistake that can turn a good label into a production problem.
If a co-packer or applicator is involved, ask for the required unwind direction in writing:
Right Edge First
Left Edge First
Top Edge First
Bottom Edge First
Also confirm face-out or face-in, core size, and maximum roll diameter.
When to Request a Proof or Small Test Run
For a first label order, a proof or small test run can be a smart step.
Request a proof or test run when:
You are using a new container
The label wraps around a bottle or jar
The product will be refrigerated
Moisture resistance matters
Colour accuracy matters
The barcode must scan at retail
A co-packer will apply the labels
The label has small type or tight margins
You are unsure about the material or finish
A proof helps check colour, size, spelling, and general appearance. A small test run can also help confirm application, handling, adhesion, and durability before ordering the full quantity.
What to Send for a Faster Label Quote
To get a more accurate label quote, send clear specs upfront.
Include:
Label size
Quantity
Artwork file
Product or container type
Application method
Roll or sheet preference
Required unwind direction
Face-out or face-in requirement
Core size
Maximum roll diameter
Material preference
Finish preference
Deadline
Delivery or pickup preference
If you do not know all the answers yet, send what you have. CETTEC can help identify what still needs to be confirmed before production.
First-Time Roll Label Checklist
Before ordering your first roll of labels, confirm:
Final label size
Product container dimensions
Roll or sheet format
Hand-applied, machine-applied, or co-packer-applied
Right Edge First, Left Edge First, Top Edge First, or Bottom Edge First
Face-out or face-in winding
Core size
Maximum roll outside diameter
Label material
Adhesive type
Matte, gloss, laminate, or uncoated finish
Bleed and safe margins
CMYK colour setup
300 dpi images at final size
Barcode size and quiet zone
Proof or test run requirement
Final deadline
FAQ
Does label unwind direction matter for hand-applied labels?
Usually, it matters less than it does for machine-applied labels. However, the right roll direction can still make hand application faster and more comfortable, especially for larger quantities.
What unwind direction do I need for bottle labels?
It depends on the applicator and how the bottle rotates during application. Confirm whether the label needs to be Right Edge First, Left Edge First, Top Edge First, or Bottom Edge First before printing.
Is the unwind direction the same as the roll direction?
In everyday label production, these terms are often used together. Both refer to how the label comes off the roll and which edge leads during application.
Should I ask my co-packer about the unwind direction?
Yes. If a co-packer is applying your labels, ask for their roll label specifications before ordering. They may have specific requirements for unwind direction, face direction, core size, and roll diameter.
Can CETTEC help review my first label order?
Yes. Send the artwork, label size, quantity, container type, application method, material preference, finish preference, and deadline. If the unwind direction or roll setup is unclear, CETTEC can help you identify what needs to be confirmed.
Final Takeaway
Label unwind direction is a small detail with a big effect on how your roll labels apply.
For first-time product brands, the safest approach is to confirm the application method before printing. If labels are being applied by hand, choose a direction that makes application easier. If labels are being applied by machine or by a co-packer, confirm the required unwind direction before production.
Send the size, quantity, artwork, container details, application method, material preference, finish, deadline, and roll requirements for a more accurate quote. If application, colour, fit, or barcode performance matters, request a proof or small test run before ordering the full quantity.